
Remove Apple Music DRM protection; Convert Apple Music to MP3, M4A,etc.

Download Spotify Music without premium; Convert Spotify Music to MP3.

Download Music from Tidal to your Computer; Convert Tidal Music to to MP3, M4A,etc.

Download Amazon Music Prime/Unlimited/HD; Convert Amazon Music to MP3.
Screen Recorder: Record Any Video/Audio and Take Snapshot
By Sarah ConnorUpdated on November 19, 2018
- Summary:
This Screen Recorder is the best screen recording software which can help you record screen (video/audio) and take a snapshot on Mac and Windows computer. Step-by-step guide will show you how to record video, music, and game playing process, etc. with Screen Recorder.

Part 1. Introduction of Screen Recorder for Windows & Mac
Screen Recorder is designed to record video/audio, streaming video/music like Youtube video, iTunes Moives, Apple Music, Spotify Music, Youtube Music, Amazon Music with high output video & audio quality. You can also use this Screen Recorder’s “Snapshot” function to take screenshot from computer with multiple editing functions.In the following, we’ll teach you how to record movies, videos, music, calls, video tutorials, TV shows, online, streaming audio, microphone voice, take snapshot or others by this screen recording software.
Key Features of Screen Recorder:
*Record Video: Record any HD videos with system audio or microphone voice.
*Capture Audio: Record any online stream music, radio, audio call and more from system audio or microphone as need.
*Take snapshots: Take screenshot at any customized size you need to quickly save the moment you need.
*Customize the recording area freely: Full screen, Custom, Fix region, Arround the mouse, Follow the mouse, Lock window, etc.
*Customize recording length and edit the recorded videos/audios, preview the recorded video before saving it.
*Edit the recorded video or snapshot like adding arrow, line, text and more.
*Customize Hotkey to Start or Stop the recording.
Part 2. How to Register the Screen Recorder
Step 1.Install Screen Recorder (Windows) or Screen Recorder (Mac)
Just click the “Download for Free” button start to download the Screen Recorder, we provides Windows version and Mac version. Then, install it on your Windows or Mac computer by following the instructions.
Step 2.Launch Screen Recording software
Launch the Screen Recorder software on PC or Mac. Then click on the “Register” icon on the upper right corner of the main interface.

Step 3.Register Screen Recorder
After clicking the “Register” icon, an new windows will pop up and ask you enter your licensed email address and registration code to register the software to getting the full functions, then click on “OK” when you have entered the information needed.

Note:
1.The registration code will be sent to you via email. If you have not received an email from us, please contact our support team.
2.The free trial version only allows you to save 3 minutes of your recordings. If you want to unlock the limitation, then please purchased the full version here.
3.This Screen Recorder software can only be downloaded and used on computer. If you want to have a free trial before buying, or you visit by mobile phone, please share this tutorial to your Facebook, Google+, Twitter, LinkedIn or Pinterest. When you use the computer, you get this page on your SNS account and download the program on the computer.
Part 3. How to Record Video and Capture Screen on PC/Mac
Step 1.Install and Launch Screen Recorder
Download, install and launch the Screen Recorder on your computer. You will see there are three main function in the software interface shows as follow.

Video Recorder: Capture video, audio, TV shows, online videos/movies, online tutorial, iTunes purchased and rented movies, game playing processes,etc. Save your webcam videos on your computer.
Audio Recorder: Record online audio, streaming music, radio show, songs and microphone voice from system audio or microphone.
Take Snapshot: Take any screenshot at any time no matter one or more from tutorials, movies, TV shows and more.
Step 2.Click “Video Recorder” to Record Video and Screen
If you want to capture video and audio on the computer, such as recording online Youtu video, DRM-ed iTunes movies, please click on the “Video Recorder” function from the main interface, after that you will see there are Four Major Settings on the “Video Recorder” interface.

#1.Record Any Video and Capture Any Activity from Computer Screen
If you want to record video or any screen activity from PC, please click the “DISPLAY1” option and turn “ON” it beside DISPLAY1.

Custom the screen recording area
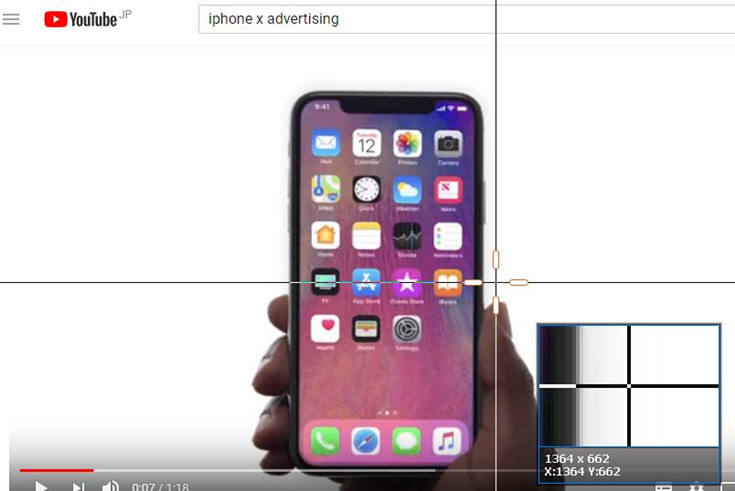
Before recording video from computer screen, please click on “∨” button in the display section to select the recording area first. The Screen Recorder software provides you different recording area options like Full screen, Custom, Fix region, Arround the mouse, Follow the mouse, Lock window, etc.
It’s very easy to set recording area with full screen or customized screen size to record videos with high quality. I often freely custom the screen recording area that I liking, you can select the one you like, then click on it.

#2.Record Webcam Video and Take Photo
If you want to take photos and record videos with your computer’s webcam, please switch the button from “OFF” to “ON” beside Webcam. After turning “ON” the button, you able to record webcam video. In additional, you can also take photos from the Webcam, simply click on the “Take photo” button then you will be able to keep the moment you want to save.

#3.Select Audio Input Channel
You can also select record video with sound/background music from System Sound or microphone, if you want to adjust the volume, you can adjust it by moving the sound bar.

#4.Record System Sound
In order to recording a high quality video. For example, to recording iTunes purchased & rented movies, Youtube video and other online videos, please Turn On System Sound and Turn Off Microphone option.
#5.Record Microphone
Microphone Recording option can help you record any microphone sound, if you want to record voice from the microphone, please then switch the button to turn “ON” beside microphone and adjust the volume by moving the sound back from left to right.
For example, if you want to make a video tutorials or record a game playing video tutorials with your narration, please Turn On Microphone before recording it.
Note: For more settings, you can click on “More settings” button from the interface.
Step 3.Start Recording Video
After making the setting above, just click on the “REC” button to start recording the screen video.

#1.Make Drawings or Add Text
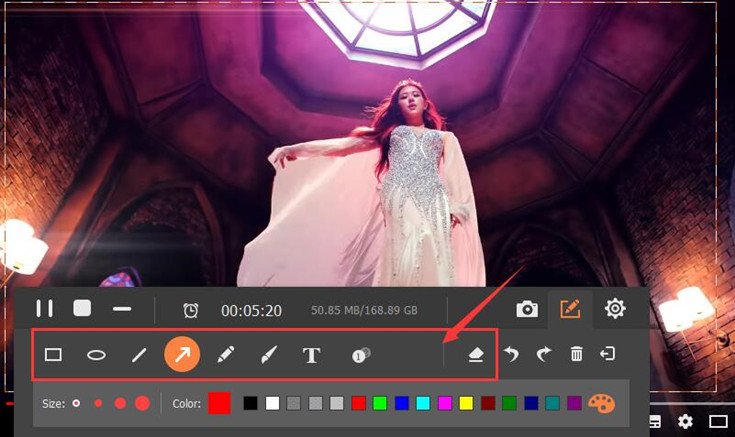
During the recording process, you can click “Edit” button to add text, arrow, line and draw to the captured video. And you can easily take snapshot by click ![]() during the recording.
during the recording.
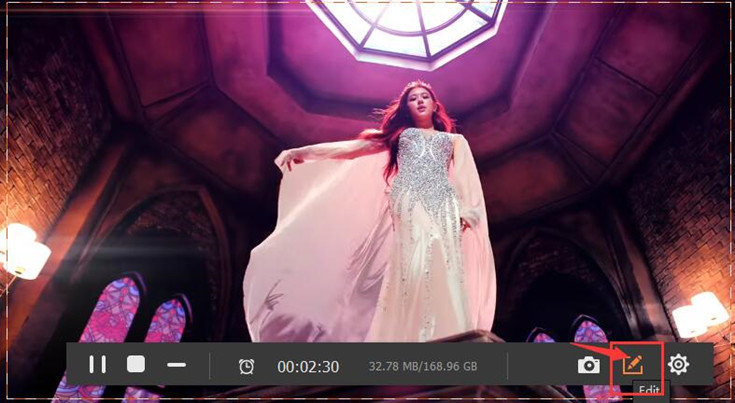
Make Drawings or Add Text when recording screen
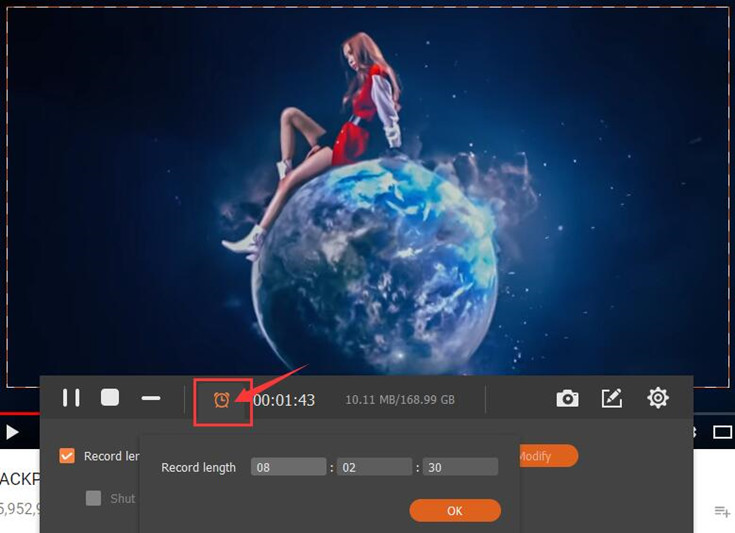
#2.Setting Recording Length
In the floating bar, simply click on the “Clock” icon and you will see a new window, select “Record length” and you can set the start time and end time that you want to recording.
Step 4.Preview and Save Recorded Video
You can click “Pause” to pause the recording process, and click “End” button to end the whole recording process.
When you finish recording, the program allows you preview the captured video before saving it. So if you are not satisfied with the recording video, you can delete it and start recording again.

Part 4. How to Record Audio/Music
Step 1.Launch Screen Recorder on PC or Mac
Launch the Screen Recorder software your computer.

Then select “Audio Recorder” from the main interface. You will see the interface as below:

Step 2.Adjust Audio Settings
If you want to record system sound, please select “System Sound” and turn it On; If you want to record voice from microphone, please turn On the “Microphone” option.And then adjust the volume, simply dragging the volume bar from left to right.

Tips: If you want to record various music, streaming music( like Apple Music, Spotify Music, Youtube Music), radio or online audio instead of downloading them, just turn On “System Sound” option.
Step 3.Setting the Output Audio Format
The Recording software can help you record any audio and output as various format, like MP3, WMA, M4A and ACC.

Step 4.Start Recording Audio from Computer
After adjusting the audio input channel and output format, just click on “REC” button to start recording audio from computer or record voice from microphone. When the recording is done, click on the “End” icon to stop recording.
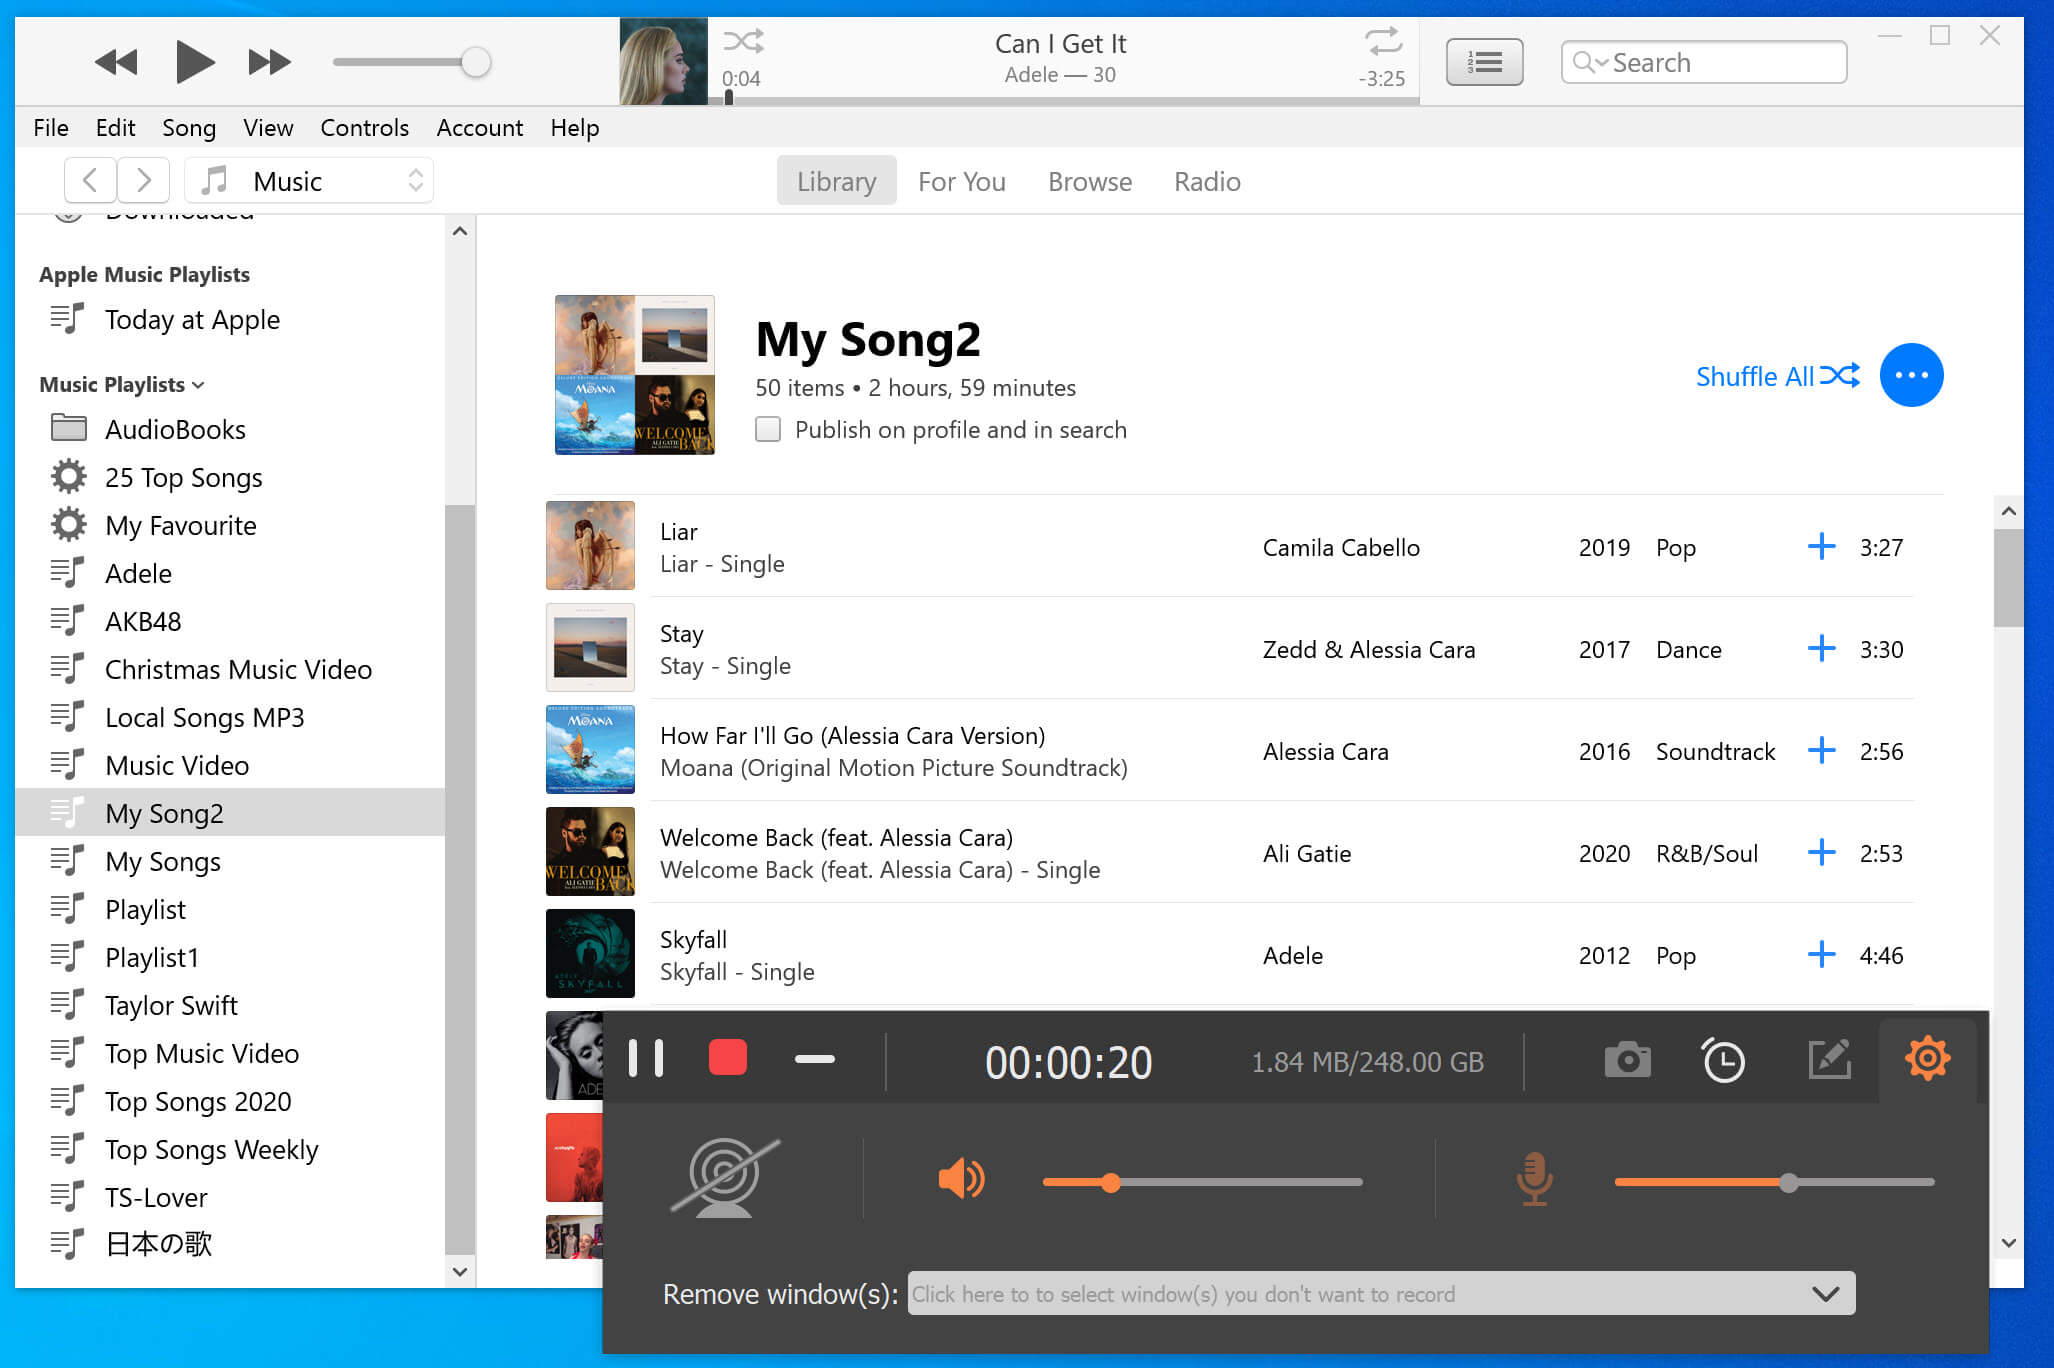
Step 5.Listening and Save the Recorded Audio/Music
After recording is complete, you can playing the recording audio/music by click “Play” button. And if you are satisfied with the recording results, you can save the video by clicking on “Save” button.

Now, the recording audio saved onto the computer, you can find it on the recording library and rename the recorded audio you like.

Part 5. How to Capture Screen
Step 1.Launch Screen Recorder
After launching the program and select the “Snapshot” option from the main interface.

Step 2.Select the Area/Region for Making A Screenshot
Now you are able to select and customize the area for making a screenshot by moving your mouse.
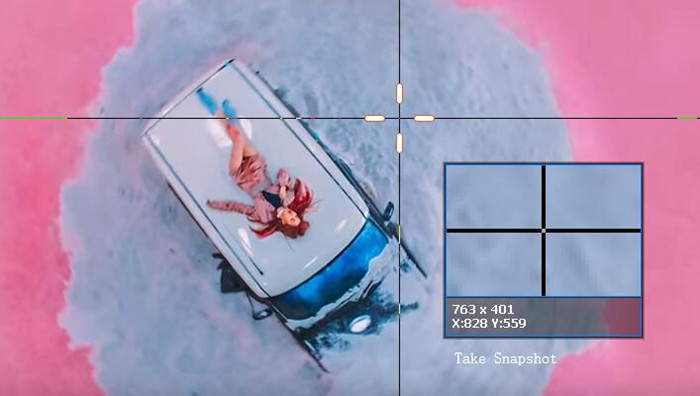
Step 3.Make Drawings and Add Text
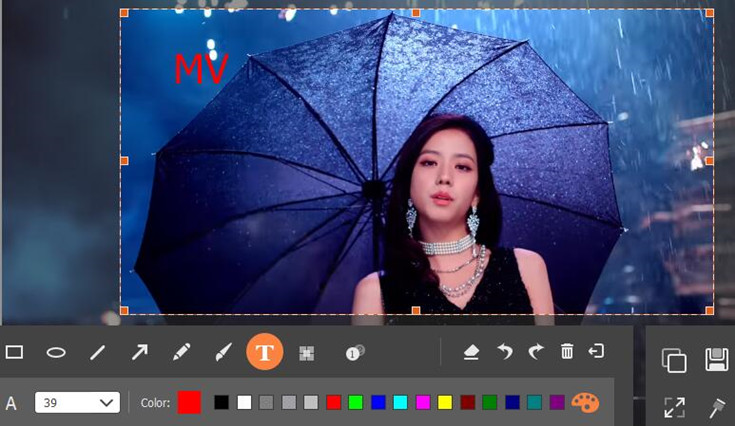
After you take a screenshot, you will be able to draw the image with different effects, like adding lines, arrows, step tools, etc. And it allows you to add text.
Make Drawings
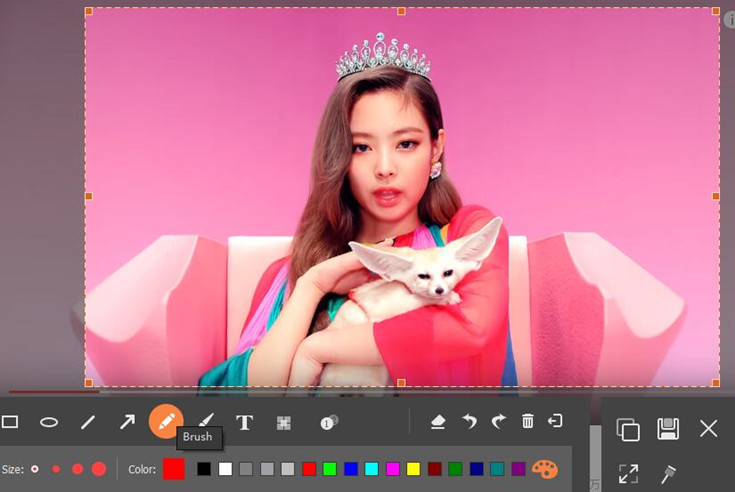
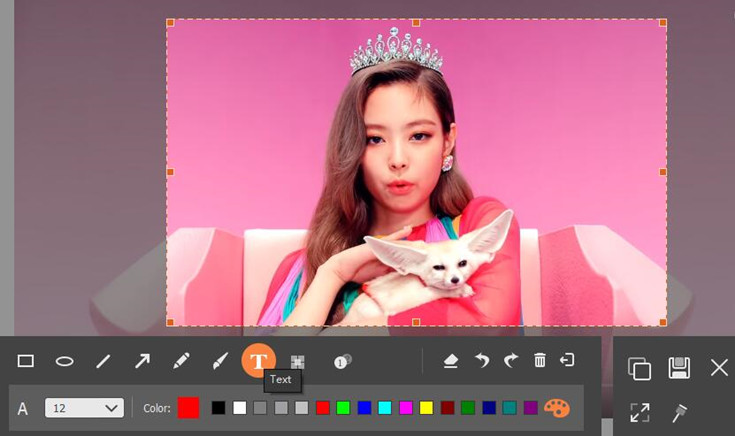
Add Text on the snapshot
Part 6. How to Use Advanced Settings
How to make your video and snapshot looks clearer and more professional by this Screen Recorder tool? You can use more advanced settings to do a good job, then go to “Menu” button from main interface. And then click on “Preferences”. Then you will be directed into the Preference section.
Step 4.Save the Screenshot
When all is done, click on “Save” button to save the image.
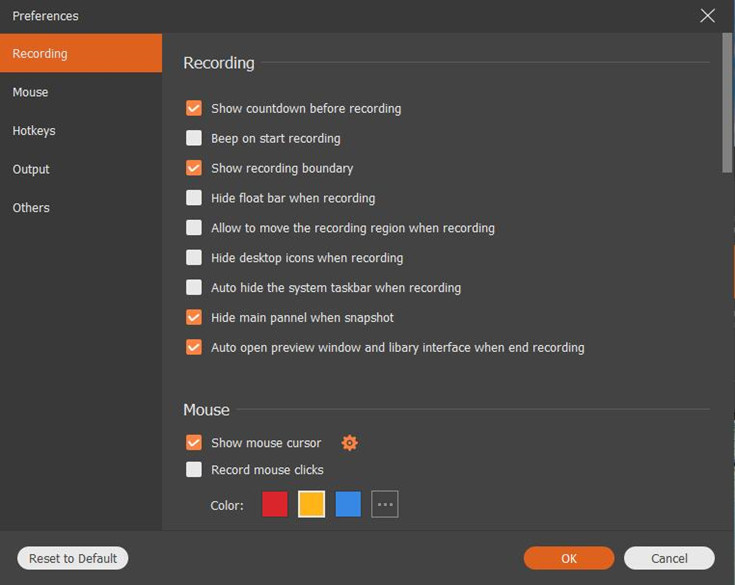
#1.Recording
* Beep on start recording
* Show recording boundary
* Hide floating bar when recording
* Allow to move the recording region when recording
* Hide desktop icons when recording
* Auto hide the system taskbar when recording
* Hide main panel when snapshot
* Auto open preview window and library interface when end recording
#2.Mouse
* Show mouse cursor
* Record mouse clicks
* Record mouse area

#3.Hotkeys
* Start/Stop record
* Pause/Resume record
* Snapshot
* Open/Close webcam
* Show/Hide float panel

#4.Output
* Location of temporary files io quality
* Location of output files io quality
* Snapshot format: JPG/JPEG, BMP, GIF, TIFF io quality
* Video format: WMV, MP4, MOV, F4V, AVI, TS, GIF io quality
* Video codec io quality
* Video quality io quality
* Frame rate io quality
* Audio format: WMA, MP3, M4A, AAC io quality
* Audio quality

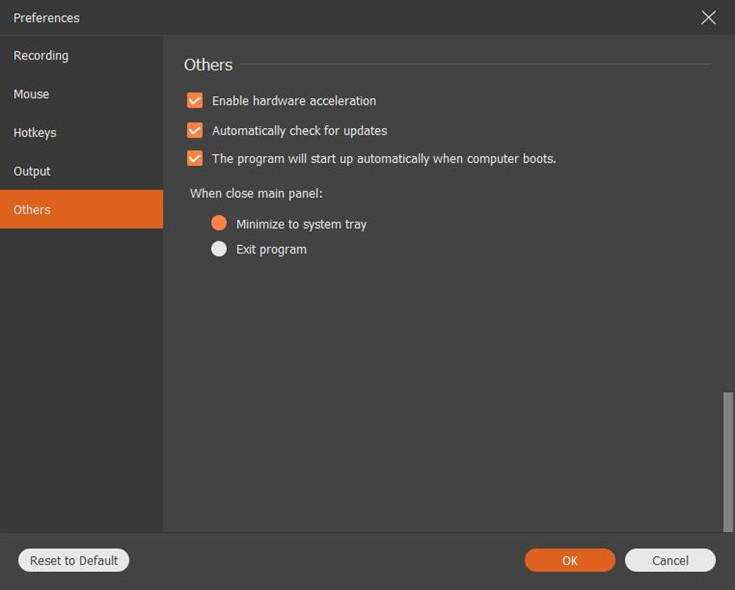
#5.Others
* Enable hardware acceleration
* Automatically check for update
* The program will start up automatically when computer boots
Part 7. Screen Recorder Tech SPEC
Supported OS: Windows 10/8.1/8/7/Vista/XP(SP2 or later)
Mac: OS X 10.6 or above (macOS Sierra and macOS High Sierra included)
CPU: 1GHz Intel/AMD CPU or above
RAM: 512 MB or more (1024MB Recommended)
Hard Disk Space: 200 MB and above free space
With the help of this Screen Recorder tool, you can highlight your mouse cursor with customized size and color; record videos with full screen or customized size with high quality; Add text, arrow, line and other drawing panels on the videos or snapshots; and add extra sound to the recording screen video from microphone. Do what you want by this powerful and userful Screen Recorder software now!
Related Article
Comments
Prompt: you need to log in before you can comment.
No account yet. Please click here to register.


No comment yet. Say something...